Tuesday, January 13, 2015

ActionPink Custom Action Figures in 2014


In late 2014, we launched the first waves of our custom action figure line. First we released the 3.75" wave and shortly after the 6" wave followed.


As I painted each new figure in the waves, I found a lack of solid custom action figure tutorials online. This gave us the idea to share what I was learning as I was creating these new characters. 


Here you will find tutorials that will be helpful, relevent, and hopefully a little entertaining. 

ActionPink has a YouTube Channel which will have a variety of video tutorial movies uploaded periodically. 


Keep an eye out for new tutorials coming soon!

~ Roderick 


Why Customize Action Figures?


So why customize action figures?

Today there is a huge interest in action figures. As franchise films and retro 80's pop culture rises in popularity, so does the demand for super cool action figures based on them. Unfortunately, not all of the action figure lines are holding the interest of the adult collector. 


The worst offender is Hasbro's Star Wars line. This line in recent years has moved away from the detail and articulation that made it's Vintage Collection popular to a more basic figure with fewer accessories and less points of articulation. The figures they do market to collectors (The Black Series) have declined in quality while rising in price. The figures released are often the same "Main Hero" characters over and over again with only a few new characters in the line. The few that are cool are often shipped with numerous paint errors, loose limbs, and weak blister glue on the packaging. 


Hasbro seems to be completely oblivious to its own market: the Star Wars Collector. Instead of making available the characters that collectors would buy over and over again (Stormtroopers, Clone Troopers) or well made new characters, they fill the pegs with version after version of Main Hero characters (Anakin, Luke, Han Solo). This results in the pegs remaining chock full of characters everyone already has or has no reason to own. 

Like most collectors, I was tired of the quality going down while the price point went up on these figures. Add to that the increasingly poor selection of characters and the equally terrible availability of them, I realized there was only one way I was going to have the characters I actually wanted - make them myself.


Wednesday, September 17, 2014

This Week in Our Store

This past week has been particularly difficult because we have no internet service at our house! We are in the process of switching from what was essentially dial-up to actual broadband, and switching internet service providers as well. It's been about a week without internet service so far, and the new service won't be installed until Friday. We have had sales, but haven't listed anything new since we dropped our old, slow service. We could have set our store to Vacation Mode during this internet-less gap, but we opted to keep it open. (The slowness of the summer has left us hungry for any sales we can get.)

During this time, our days have started with getting kids to school, then parking outside of fast food restaurants to hop on their free WiFi. Once we answer any messages, and see what sold in the night, we go home to pack and weigh. Then, I drive to the public library to pay for shipping labels and save them on my computer. After that, I go back home to print and attach the labels. Only after all of that running around can we then drive packages to the post office.

I realize that it would be entirely possible to continue listing during this period. We could write listings and take photos at home, then do the rest of the listing at the library. However, it just seems too frustrating to me. When listing, I like to be able to have an item right in front of me just in case I need to reference it once more. Tonight, we are going to try listing some stuff from my brother-in-law's house.

While the lack of internet service at home this week has been entirely frustrating, we're still getting most of our eBay work done. I can not wait for Friday to come so we can get back to business as usual!

The best part of this past week is that we have now sold a total of three handmade aprons! Two have sold on Etsy, and one has sold on eBay.

Well, back to work!

-Ashley

Saturday, September 6, 2014

Selling Handmade - Update

I am so thrilled to say we have sold our first handmade item! We sold a Darth Vader inspired apron through our Etsy store!

I designed and constructed this apron, and Roderick hand painted the front "control panel" pocket.


I can't wait to get started on some more of these aprons. With Halloween approaching, I'd better get busy!

- Ashley

Friday, September 5, 2014

Stop Buying Boxes!

If you are buying boxes for your eBay store, you might as well be throwing money into a paper shredder.

When we first started our eBay store, we purchased cases of boxes from a shipping supplier. We liked having fresh, clean looking boxes, and we (almost) always had the right size box for the kinds of items we were selling. But, as our business grew, we started spending more and more money on boxes.

At first, we started asking family members and friends to set aside boxes for us, but we were always in need of more boxes.  As it turned out, our solution was right in front of us the whole time.

Every day, grocery stores and other retailers open boxes of new stock, then recycle or throw away the boxes their stock was shipped in. Any day of the week, we can walk into my local grocer and walk out with as many boxes as we can carry. All you have to do is ask! The employee stocking shelves is usually happy to get rid of the extra boxes- one less task for them to do.


You can turn the boxes inside out so they have plain brown exteriors and arrive to your buyer looking professional.

We've also had great luck asking for bubble wrap, packing peanuts, and boxes on Craigslist, Freecycle and Facebook. We very rarely have to buy bubble wrap or packing peanuts because of the generosity of our community.

While it is great that getting free shipping supplies saves us money, it's even more gratifying that we are keeping these boxes, peanuts and bubble wrap out of landfills. Recycled paper products are great, but it's even greater when these things can be reused first!

The other fantastic source of free boxes is, of course, free Priority Mail boxes from the USPS! You can have free boxes delivered to your house for free with a few clicks on USPS.com. You can even get eBay branded Priority Mail boxes at ebaysupplies.usps.com/usps

When we first started out on eBay, we were aware that there were free boxes available from the USPS. We didn't fully understand how regional rate and flat rate boxes worked, so we didn't order any of the free boxes. What a newbie mistake that was! Now, we make sure we are stocked up on Priority Mail boxes.

How do you get your shipping supplies for eBay? What works for you? Let us know in the comments below!

Tuesday, August 19, 2014

Selling Handmade

Since childhood, I wanted to make things with my hands and sell them. In 5th grade, I made bead lizards out of plastic pony beads and little felt snakes stuffed with brown rice. My mother helped me create a display board to take to school, and I sold each little creature for fifty cents to my classmates. My dad helped me with my first eBay listing- one of those beaded lizards. It never sold, but I remained determined to grow up and one day sell my handmade wares.

After high school, I went to college to study Fashion Design and Art History. I became obsessed with learning as much as I could about design and technique. I worked a few jobs as a seamstress, and later became the costume designer for a local theater. Along the way, I discovered Etsy and sold a few hand made things now and then, but I never had the time to invest in making up a bunch of stock for my store.

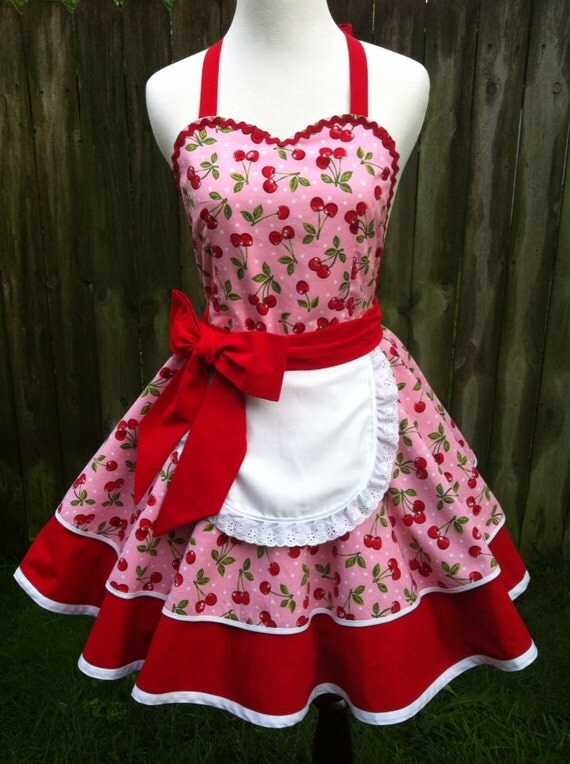
Fast forward to today, I have finally found the time to start putting my plans into action. I have started listing some handmade vintage inspired dresses and aprons. It feels great to be doing what I love, and rewarding to know I no longer have a boss soaking in all of the profits from my labor.

Sweet Cherry Pie Apron


So, I've sold some handmade items on Etsy, and I've sold clothing on eBay, but I've never nothing of this quality or quantity before. I have to admit, I'm probably going to do a happy little dance when I hear the "cha-ching" for the sale of one of these garments. I hope that these will take off and become a regular item in our eBay store.

We are, of course, going to continue picking thrift stores, yard sales etc. But it will be nice to have yet another kind of merchandise in the store.

-Ashley

Saturday, August 9, 2014

DIY: Add Value to Framed Art with a New Paper Backing

One of my favorite things to sell on eBay is art- especially framed paintings and prints. Framed art can be flipped with a great profit margin. Plus, you can hang it up to enjoy until it sells! Our walls are constantly changing as we sell and buy more art to list.


Thrift stores and yard sales are great sources for inexpensive art pieces, but they sometimes need a little sprucing up. One of the easiest things to fix is the often over-looked backside of the frame.


Most framed art is finished off with a brown paper backing. If that paper is torn or missing, it may detract from the value of the piece. With a few spare minutes and some basic supplies, you can easily replace the backing and leave a great impression on potential buyers.

What you need:

     - Brown Shipping Paper
     - 1 or 2 Glue Sticks
     - Razor Blade or Craft Knife
     - Cutting Mat


Start by removing the old paper backing. Try to take off as much as you can, but don't worry if there are a few remaining little bits stuck on. You will also need to remove any existing hardware for hanging. Set the hardware aside to re-attach later.

Next, roll out enough brown paper to cover the back of your frame, plus a margin of a few inches all the way around. Use weights or cans to hold the paper down and keep it in place.


Now you're ready for gluing. Working quickly, use a glue stick to cover the back of the frame, making sure to get glue all the way to the edges and each corner point. Do not put glue on the back of the matte.

Once you have applied glue, promptly flip the frame glue side down onto the brown paper. Leave a slight margin of paper all the way around the frame.

Press firmly around the edges of the frame to ensure a good seal. Then, leave it in place to dry for 10 to 15 minutes. Flip everything over so that the paper is now on top. Carefully check to make sure all edges are adhered. Add more glue if needed. Let dry paper side up for 10 to 15 minutes longer.

Next, turn your frame paper side down onto a cutting mat. Carefully slide a sharp razor blade or craft knife along the edge of the frame to remove the excess paper.

Re-attach hanging hardware and wipe the edges with a cloth to remove any residue.


Now, your framed art will look fresh professional. Don't forget to show off your handiwork in your listing photos!

Have any tips for framed art? Share them in the comments below!

- Ashley